

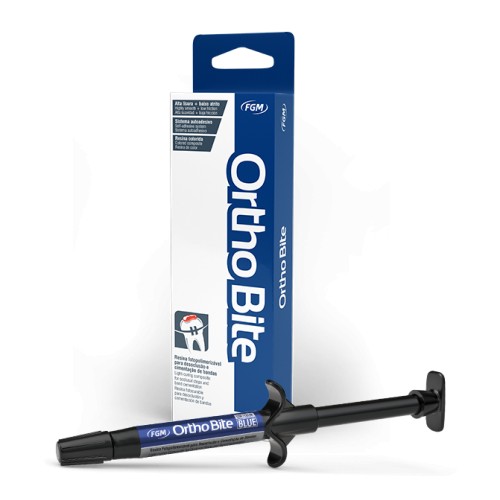
Description
Description :
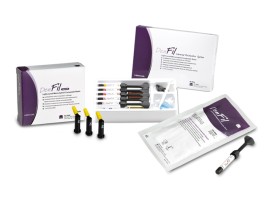
Light-curing composite for temporary dental disocclusion and band cementation.
- Self-adhesive system
- Self-leveling
Benefits :
- Versatility :
Due to its balanced viscosity, it allows you to make occlusal lifts and cement orthodontic bands with a single product.
- Self-adhesive system :
Its self-adhesive formula dispenses the previous use of adhesive making the clinical stage faster. When greater adhesion due to occlusal load is required, state-of-the-art adhesives can be used to increase adhesion.
- Self-leveling resin :
Its rheology allows perfect adaptation of the material, providing greater accuracy in the preparation of occlusal lift.
- High Smoothness :
The nanometric spherical particles give a high level of smoothness to the surface, which favors slippage during the occlusal function, bringing more comfort to the patient, dispensing with pastes or special polishing materials.
- Strength in Orthodontic Band Cementation :
Its high adhesion avoids unwanted displacement of the bands especially in cases where occlusal forces are greater (bands that support accessories, use of heavy elastics, teeth that receive occlusal load directly on the tubes, brachyfacial patients, etc.). It has greater adhesive strength to the tooth when compared to the glass ionomer cement.
- Easy Application and Removal :
The presence of blue dye helps in the application and allows easy removal of product residue avoiding unnecessary wear of enamel.
Recommendations :
- Temporary dental disocclusion.
- Cementation of orthodontic bands.
Step by step :
Step 1 of 5 :
![foto-1-4-300x200[1]](https://fgmdentalgroup.com/wp-content/uploads/2022/11/foto-1-4-300x2001-1.jpg)
- The method for applying the resin to the tooth is described below. However, the Orthodontist is responsible for defining the best strategy to use the resin in accordance with the occlusion problem presented by the patient. The application site, amount of resin to be applied, format of the increments and resin amount of time in the mouth may vary significantly.
Step 2 of 5 :![foto-2-7-300x200[1]](https://fgmdentalgroup.com/wp-content/uploads/2022/11/foto-2-7-300x2001-1.jpg)
- Having installed the device onto the upper and lower arches, verify where the occlusal contacts are, to decide what is the best site to apply the product.
Step 3 of 5 :![foto-3-4-300x212[1]](https://fgmdentalgroup.com/wp-content/uploads/2022/11/foto-3-4-300x2121-1.jpg)
-Having properly cleaned the tooth, apply phosphoric acid at 37% (Condac 37 – FGM) to the tooth’s occlusal surface for 30 seconds. After that, rinse the area and dry it until it is free from fluids by absolute or relative insulation.
Step 4 of 5 :![foto-4-4-300x199[1]](https://fgmdentalgroup.com/wp-content/uploads/2022/11/foto-4-4-300x1991-1.jpg)
- Apply Ortho Bite to the occlusal surface of the tooth in increments of up to 2mm each until the desired disocclusion is reached.
Step 5 of 5 :![foto-5-7-300x212[1]](https://fgmdentalgroup.com/wp-content/uploads/2022/11/foto-5-7-300x2121-1.jpg)
- Light cure each increment for 20 seconds.
-Check whether the product has reached the desired stop level; the stop should be as small as possible, producing 1mm non-occlusion to the other teeth. The stop may be made in different shapes and heights, according to the case.
-Ortho Bite composite is self-adhesive on etched enamel, dispensed with the use of adhesive. Not using the adhesive prior to the resin provides enough enamel adherence levels for good performance of the material during chewing in most patients. However, in cases where the resin undergoes excessive occlusal stress (e.g. parafunction, overbite, brachyfacial patients etc.) or the tooth has an occlusal surface with very deep and irregular grooves, the use of adhesive is recommended prior to application of the resin since there is increased adherence through the infiltration of the adhesive throughout the area that had been etched. As such, apply the adhesive according to the protocol suggested in the respective Instructions for Use.
Step by step :
For Orthodontic Bands Cementation :
Step 1 of 5 :
![foto-6-3-300x221[1]](https://fgmdentalgroup.com/wp-content/uploads/2022/11/foto-6-3-300x2211-1.jpg)
- Having cleaned the tooth, apply phosphoric acid at 37% (Condac 37, FGM) at the free faces of the tooth (vestibular and tongue/palate). After 30 seconds, remove the acid and dry the enamel, making it free from contaminants using relative insulation.
Step 2 of 5 :![foto-7-5-300x200[1]](https://fgmdentalgroup.com/wp-content/uploads/2022/11/foto-7-5-300x2001-1.jpg)
- Roughen the inside of the orthodontic band with the aid of an abrasive stone for greater retention of the cement. Apply a small amount of Ortho Bite along the entire internal perimeter of the band.
Step 3 of 5 :![foto-8-1-300x200[1]](https://fgmdentalgroup.com/wp-content/uploads/2022/11/foto-8-1-300x2001-1.jpg)
- Then, position the band on the tooth, making sure it is settled correctly (note: if necessary use a bite stick).
Step 4 of 5 :![foto-9-1-300x215[1]](https://fgmdentalgroup.com/wp-content/uploads/2022/11/foto-9-1-300x2151-1.jpg)
- Remove the excess cement on the occlusal and cervical surfaces with the help of a dental probe or spatula.
Step 5 of 5 :![foto-10-1-300x200[1]](https://fgmdentalgroup.com/wp-content/uploads/2022/11/foto-10-1-300x2001-1.jpg)
- Light cure for 40 seconds on the occlusal surface and 40 seconds on the cervical surface. Ask the patient to not eat or drink for at least 30 minutes.
-thumb_270.jpg)


0 Review for “Ortho Bite | Light-Curing Composite For Temporary Dental Disocclusion And Band Cementation.”
5 Stars
0%
4 Stars
0%
3 Stars
0%
2 Stars
0%
1 Stars
0%